Searching for “roof leak repair near me” is one of the most stressful moments a homeowner can face, especially when water is actively coming into your home. The good news is that acting quickly and in the right order makes a significant difference in how much damage you end up dealing with and what your insurance company will cover. Homeowners in Burr Ridge and surrounding areas deal with some of the toughest roofing conditions in the Midwest, and knowing exactly what to do in the first hours after finding a leak can protect your home and your wallet.
Here is what this guide will help you with:
- Immediate steps: What to do in the first few minutes and hours to stop water from spreading through your home.
- Documentation guidance: How to record the damage in a way that supports an insurance claim and protects you from a denied payout.
- Next steps: How to find the right contractor, understand your repair options, and avoid the common mistakes that turn a small leak into a big expense.
Why Acting Fast on a Roof Leak Matters More Than You Think
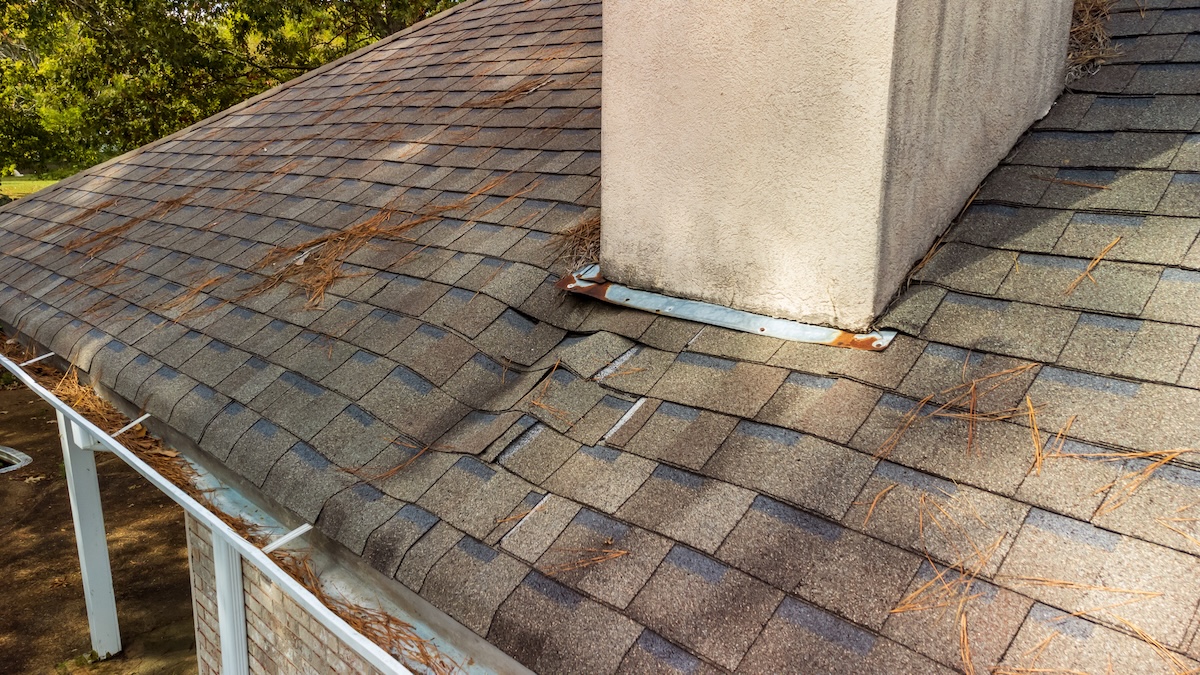
A roof leak rarely stays a roof problem for long. Water that enters through a damaged shingle, failed flashing, or a cracked pipe boot does not stay at the point of entry. It travels along rafters, pools on top of drywall, soaks insulation, and can reach electrical wiring and wall cavities within hours. The faster you respond, the more you limit that chain reaction.
Water damage and freezing claims are the second most common type of homeowners insurance claim in the United States, accounting for roughly 27.6 percent of all claims, with average payouts exceeding $13,000 per incident. That number reflects what happens when water is left to spread unchecked. Acting on the eight steps below puts you in control of the situation from the moment you spot a problem.
8 Things to Do Immediately After Finding a Roof Leak
The steps below are arranged in order of priority. The first few are about protecting your home and your family right now. The later ones are about making sure the repair gets done correctly and that you are not left paying for damage you should not have to cover out of pocket. Homeowners in Burr Ridge and surrounding areas can follow this exact sequence regardless of what caused the leak.
1. Move Valuables and Protect Your Belongings
The single most important thing to do the moment you find a leak is to get anything valuable out of the affected area. Water damage to furniture, electronics, clothing, and personal items happens fast, and most of those losses are avoidable with a few minutes of quick action. Move items to a dry room, lay down towels or plastic sheeting on floors, and cover anything you cannot move with waterproof tarps. Do not underestimate how far water can travel. A small ceiling stain can mean water has already spread several feet in every direction above the drywall, and it can drip through at multiple points without warning.
- Electronics and documents: Move computers, televisions, important paperwork, and valuables to a completely dry area of the home as the first priority.
- Furniture and rugs: Slide furniture off wet flooring immediately, as prolonged contact with wet subfloor allows moisture to wick up into wood legs and cushions within hours.
- Floor protection: Lay down old towels, buckets, or plastic sheeting to catch dripping water and protect hardwood and laminate floors, which can warp or buckle quickly when wet.
- Uncoverable items: For large furniture you cannot move, slide aluminum foil or plastic wrap under the legs to prevent rust staining and moisture absorption from a wet floor.
2. Relieve Ceiling Bulges Before They Burst
If you see a bubble or a sagging bulge in your ceiling, that area is holding collected water above it, and it will eventually release on its own in the worst possible way. A ceiling bulge that bursts unexpectedly can dump gallons of water at once, causing far more damage to floors, walls, and belongings than a controlled release. The right move is to carefully puncture the lowest point of the bulge with a screwdriver or small nail and place a bucket directly beneath it to catch the flow. This small act of controlled drainage prevents a much larger mess and, importantly, it prevents the weight of trapped water from causing the ceiling material to collapse in a large section.
- Tools to use: A screwdriver, nail, or awl is enough. You do not need to make a large hole, just enough to give the water a controlled exit point at the lowest spot of the bulge.
- Bucket placement: Position a bucket directly below before you puncture the ceiling. Have extra towels ready, as more water may flow than you expect once the bubble opens.
- Safety first: If the bulge is near a light fixture or ceiling fan, turn off the circuit breaker for that room before approaching the area. Water and live electricity are a serious hazard.
- Document before you drain: Take a photo or short video of the bulge before puncturing it. That visual record shows the insurance adjuster the extent of the initial water accumulation.
3. Contain the Water and Limit Interior Damage
Once you have addressed any ceiling bulges, your next goal is to limit how far the water spreads. Set up as many buckets and containers as you need to catch active dripping. If water is running down a wall, tack plastic sheeting to the wall above the wet area to redirect the flow into a bucket rather than letting it spread along baseboards and into the floor. Containing the water quickly also prevents it from reaching rooms that are not yet affected, which matters both for protecting your home and for demonstrating to your insurance company that you took reasonable steps to minimize the loss.
- Multiple collection points: Use every bucket, pot, and container in the house if needed. Water rarely drips from just one spot, especially if the leak has been active for more than a few minutes.
- Wall runoff: Tack plastic sheeting or garbage bags against the wall above the wet area so water runs into a container rather than soaking into baseboards, trim, and flooring.
- Floor protection: Lay down thick towels and change them frequently. Standing water on hardwood, laminate, or carpet causes damage within hours that can require full floor replacement.
- Ventilation: Open windows in the affected area if weather permits to begin drying out the space, which slows mold growth and reduces the total damage scope.
4. Document Everything Before Any Cleanup
Before you clean up a single thing, take thorough photos and video of all the damage. This step is critical for homeowners planning to file an insurance claim, and skipping it or doing it incompletely is one of the most common reasons claims are reduced or denied. Walk through every affected room and document water stains on ceilings, wet walls, damaged belongings, water on the floor, and any visible damage to the roof from the ground. Timestamps on your photos matter, so make sure your phone’s date and time are set correctly. The more thorough your documentation, the stronger your position when your insurance adjuster arrives.
- Ceiling and walls: Photograph every water stain, discoloration, and wet patch from multiple angles. Wide shots establish context; close-up shots show detail.
- Damaged belongings: Document every item that has been damaged or that you moved to protect from water. A written list with estimated values, supported by photos, strengthens a personal property claim.
- Roof exterior: If you can safely see the roof from the ground, photograph any visible missing shingles, displaced flashing, or storm damage. Do not climb onto the roof yourself.
- Video walkthrough: A short video where you narrate what you are seeing adds powerful context that static photos alone cannot capture.
5. Apply a Temporary Fix If It Is Safe to Do So
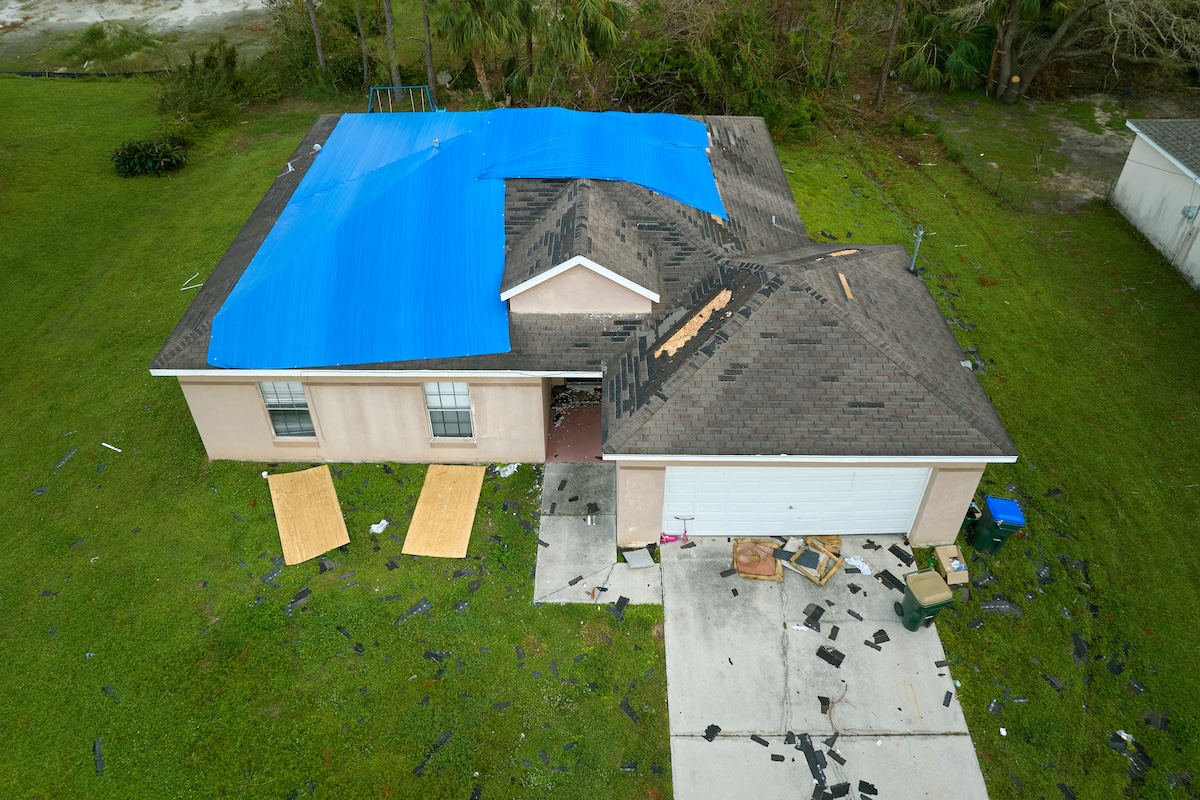
In many cases, a licensed contractor will not be able to arrive the same day, especially after a widespread storm that affects multiple homes in Burr Ridge and surrounding areas. If the weather has cleared and you can safely access a lower-slope area of the roof or an attic hatch, a temporary fix can stop water from continuing to enter while you wait for professional repair. The most effective temporary measures are roofing tarps secured with lumber, or roof repair tape applied over obvious damage points. These are not permanent solutions, but they stop the bleeding. If there is any doubt about safety, do not attempt roof access yourself. A fall from a wet roof is far more costly than additional water damage.
- Tarping: A heavy-duty polyethylene tarp secured with 2×4 lumber across the ridge is the most effective temporary cover for a large damaged area and the method most contractors and emergency responders recommend.
- Roof repair tape: Butyl-based roof repair tape pressed firmly over a small crack, lifted shingle, or exposed flashing edge provides a quick temporary seal on accessible, low-slope areas.
- Attic access: If you can safely access the attic, placing a tarp or heavy plastic sheeting over the damaged area from the inside can slow interior water entry without requiring you to go on the roof.
- What to avoid: Do not use duct tape, standard caulk, or household sealants as a roof repair. They will not hold in wet conditions and may interfere with the permanent repair.
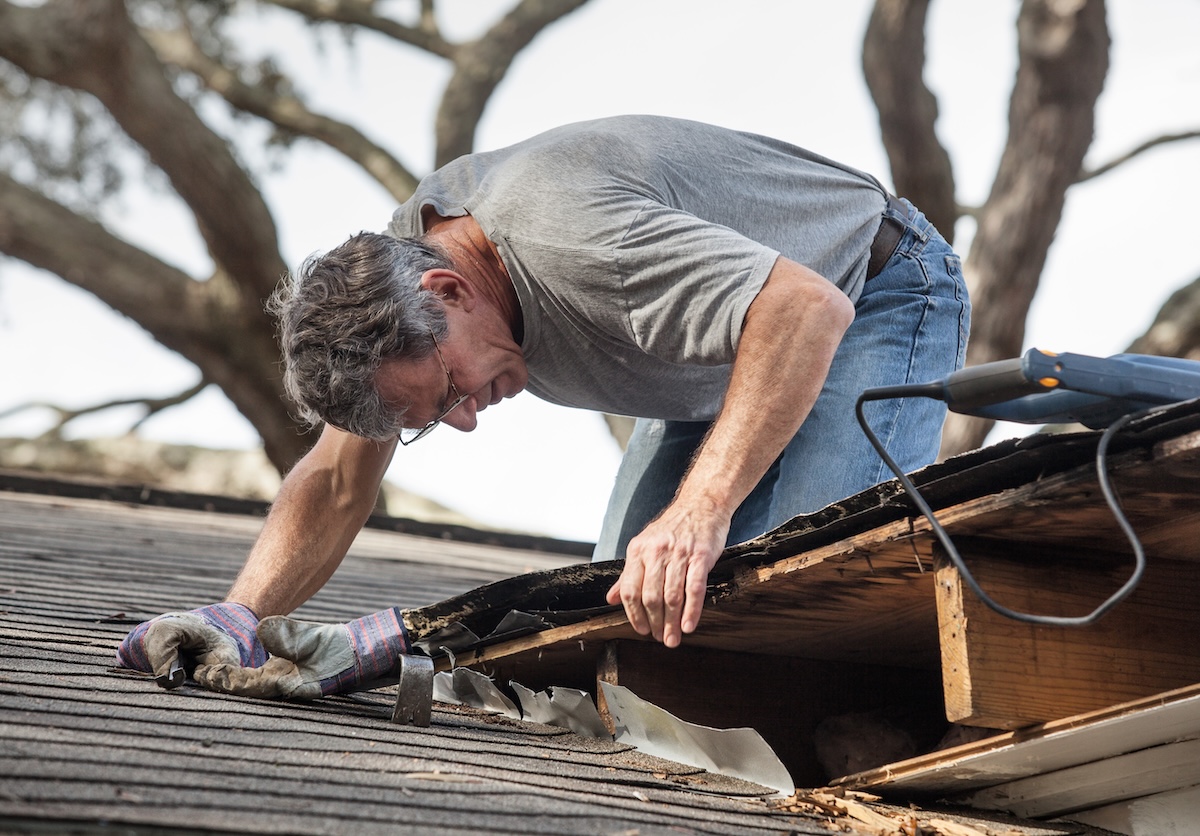
6. Call a Licensed Local Roofing Contractor Right Away
As soon as you have contained the water and documented the damage, call a licensed local roofing contractor. Do not wait. Every hour a leak goes unrepaired, water continues to travel through your home’s structure, and the risk of mold growth increases significantly. Mold can begin developing within 24 to 48 hours of water exposure in the right temperature and humidity conditions, and remediation adds thousands of dollars to the total damage cost. When you call, ask specifically about emergency response and same-day tarping, whether the company is licensed under the Illinois Roofing Industry Licensing Act, and whether they offer complimentary inspections. A reputable contractor will want to see the damage before quoting a repair scope, and they will not pressure you to sign anything before the inspection is complete.
- Illinois licensing: Illinois requires roofing contractors to hold a license under the Illinois Roofing Industry Licensing Act. Always verify before allowing anyone on your roof.
- Manufacturer certifications: Contractors holding certifications like GAF Silver Pledge or Owens Corning Preferred status have met additional training requirements beyond basic licensing and are held to higher workmanship standards.
- Emergency tarping: Ask specifically whether the contractor can dispatch a crew for same-day emergency tarping if the repair cannot be completed immediately. Stopping active water entry is the top priority.
- No-pressure estimates: A trustworthy contractor provides a written estimate after a thorough inspection and does not require you to sign a contract on the spot or before you have reviewed the scope.
7. Contact Your Homeowners Insurance Company
Once you have a licensed contractor involved and documentation in hand, contact your homeowners insurance company to report the damage. Most policies require you to report damage promptly, and waiting too long can give the insurance company grounds to reduce or deny your claim. When you call, have your documentation ready: photos, video, and a basic description of when you first noticed the leak and what caused it if you know. Be straightforward about the timeline. Homeowners insurance typically covers roof leaks caused by a sudden event like a storm, hail, or fallen tree, but it generally does not cover leaks that developed gradually due to deferred maintenance. Knowing that distinction before you call helps you present your claim accurately and confidently.
- Report promptly: Most policies have a reporting window. Calling within 24 to 48 hours of discovering the damage keeps you safely within most policy requirements.
- Stick to facts: Describe what happened and what you observed without speculating about cause. Let the adjuster and your contractor’s inspection determine the official cause of damage.
- Request a claim number: Always get a claim number during your first call and write down the name of the representative you spoke with. This creates a paper trail from the beginning of the process.
- Ask about additional living expenses: If the damage makes part of your home uninhabitable, ask your insurer whether your policy covers temporary housing costs while repairs are underway.
8. Get a Licensed Public Adjuster Involved If Needed
Insurance adjusters work for the insurance company. A licensed public adjuster works for you. If your claim is denied, underpaid, or you feel the damage assessment does not reflect reality, a licensed public adjuster can re-evaluate the damage independently, document additional losses the insurance adjuster may have missed, and negotiate with your carrier on your behalf. This step is especially valuable after significant storm events where insurance companies are processing hundreds of claims at once and individual assessments can be rushed. In Illinois, public adjusters are licensed and regulated by the Illinois Department of Insurance, which means they are held to a professional standard and cannot charge a fee unless they recover money for you.
- When to hire one: Consider a licensed public adjuster if your claim is denied, if the insurance payout does not cover the full documented damage, or if the adjuster’s cause-of-loss determination does not match what your contractor found.
- Cost structure: Illinois public adjusters typically work on a contingency basis, meaning they take a percentage of the settlement they recover rather than charging upfront fees.
- Lifetime Restoration advantage: Lifetime Restoration has a licensed public adjuster on staff, which means you do not have to find one separately. Our team can handle both the physical repair and the claims process under one roof.
- Documentation support: A public adjuster will use your photos, contractor findings, and weather data from the storm date to build a documented case that supports the full value of your claim.
How Much Does Roof Leak Repair Cost in Illinois?
Repair costs depend heavily on what caused the leak and how long the water was active before the repair. A small flashing repair or pipe boot replacement might cost $200 to $600, while a leak that damaged the roof deck, insulation, and interior drywall can easily reach $3,000 to $8,000 or more once all trades are accounted for. Homeowners in Burr Ridge and surrounding areas should be cautious of any contractor who provides a firm price before completing an inspection, as the true scope of a leak repair often includes hidden water damage that is only visible once the affected area is opened up.
Acting on the eight steps above gives you the best possible outcome regardless of repair cost. You protect your belongings, support your insurance claim, and give a licensed contractor the clearest possible picture of what needs to be fixed.
Frequently Asked Questions About Roof Leak Repair in Illinois
How Quickly Should I Act After Finding a Roof Leak?
Immediately. Contain water, move valuables, and document the damage within the first hour. Call a licensed contractor the same day. Mold can begin growing within 24 to 48 hours of water exposure, and your insurance policy likely requires prompt reporting.
Will My Homeowners Insurance Cover a Roof Leak?
It depends on the cause. Insurance typically covers leaks from sudden events like hail, wind, or a fallen branch. Leaks caused by aging materials, deferred maintenance, or gradual deterioration are usually excluded. Lifetime Restoration’s licensed public adjuster can help you understand what your policy covers and document the cause accurately.
Should I Climb on My Roof to Find the Leak?
No. Roof surfaces are dangerous, especially when wet. Do what you can safely from the ground or from inside the attic. Leave roof access, inspection, and temporary tarping to a licensed roofing contractor with the proper equipment and safety training.
How Do I Find the Source of a Roof Leak?
Roof leaks rarely enter directly above where the water appears inside. Water travels along rafters and sheathing before dripping down. A licensed contractor traces the water path from the interior stain back to the actual entry point on the roof, which is often a failed pipe boot, lifted flashing, or cracked sealant rather than a missing shingle.
How Long Does a Roof Leak Repair Take?
Most straightforward repairs, such as flashing replacement or a pipe boot swap, are completed in a few hours. Repairs that include deck replacement or interior drywall and insulation work may take one to three days. Emergency tarping can be done the same day to stop active water entry while the full repair is scheduled.
What Is a Licensed Public Adjuster and Do I Need One?
A licensed public adjuster is an insurance professional who works on behalf of the homeowner, not the insurance company, to document damage and negotiate a fair claim settlement. You do not always need one, but if your claim is denied or the payout seems low relative to the actual damage, having one in your corner makes a real difference.
Why Burr Ridge Homeowners Trust Lifetime Restoration
Finding a roof leak is stressful, but you do not have to figure it out alone. Lifetime Restoration has served homeowners in Burr Ridge and surrounding areas as a GAF Silver Pledge contractor, an Owens Corning Preferred contractor, and a Hardie-certified installer, bringing manufacturer-level expertise to every repair we complete.
We offer complimentary inspections so you get a clear, honest picture of what your roof needs before any work begins. Our licensed public adjuster is available in-house to help you navigate the insurance process from start to finish, and our financing options mean that necessary repairs do not have to wait on a budget. From the moment you call us after finding a leak to the final walkthrough of your completed repair, Lifetime Restoration handles every step with care and professionalism. Contact us today to schedule your complimentary inspection and get your home protected.